Thursday, June 10, 2010
Clock 3
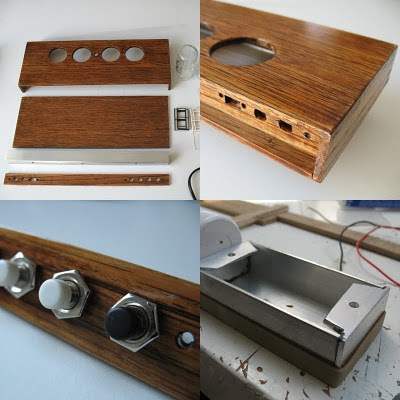
I just cut a piece of plexiglass to fit the housing of clock 3. The back is sprayed with black paint, just enough to simulate the smoky effect but transparant enough for the red light to come through. I have to sort out the electronic part before I can fix the top of the housing to the rest. And still to do: buttons and a red led to show the alarm is on on the left of the front. The housing has already 2 holes for the switches that will double as feet allowing you to smack the clock to silence it.
There's A Clock In Here Somewhere
Clock 3 and 4 are underway. Number 3 is going to be a quite simple one, wooden casing with a plexiglass front and standard LED display from the donor clock. The only cool feauture of this one will be that the "alarm off" buttons will be placed under de housing, so if the alarm goes off you only have to slam the clock and it will turn the buzzer off!
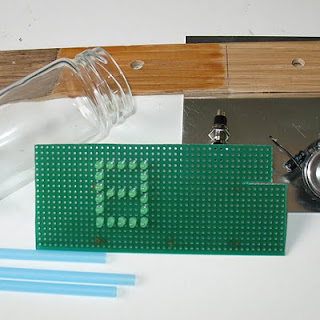
Number 4 clock is still a mystery, all I know is that I want to use the glass jars again but have it done in less time. The number 2 clock took me in excess of 100 hours to make. The display could be as you see in the photo, LED's on a pcb. But I could also put them on a clear piece of plexiglass (like I did last time) and drill about 170 1mm holes. Hmmm.
Next time more about clock 3.
Monday, June 7, 2010
Finished Clock
It was exciting up until the last minute when finally all the digits lighted up properly. I didn't know if it was gonna work until I had all 4 hooked up, since they share power between them. A couple of lights didn't work at some point and drove me up the wall. I really wanted to finish it. And I have. Hope you like it.
This clock wwas featured on Hack A Day.
Saturday, June 5, 2010
Pieces Coming Together
The longer I work on this clock the more difficult problems I face and also realise how daunting this task is. I made a housing but will it all fit? Will the clock actually work?
Final assembly is underway, I have to connect many many wires to the individual LED's to and fro the PCB. Some work fine but some seem like a puzzle and I have no clue why it doesn't work.
But soon it will be finished and I enjoyed it, to combine woodworking, aluminium, LED's and electronics into a working product. It has been one of the most difficult things I made, for the sheer amount of patience required, but it was well worth it I think.
Next time, proper photos of the finished alarm clock.
Tuesday, June 1, 2010
Sunday, May 30, 2010
Taking Time To Destroy A Clock
Today I did something odd. I went to buy an alarm clock and as soon as I got home, took it apart. Which was easy at first, you have the display with almost invisible LED's, there's an adapter converting 220 Volt to... something lower. There's buttons, a speaker and of course the main PCB holding the brains of the clock.
In case you want to do what I'm doing, the donor clock I'm using is a Denver EC-33, costs about 8 euro's. But I reckon you could use any alarm clock.
I realize it's not going to be easy making the display work, 4 numbers separated by jars, each needing wires to the main PCB. It's gonna be messy.
For the housing I found oak strips of wood, 4 x 35 mm and decided the width of the housing should be 3 strips wide, 105 mm.
In the supermarket I selected jars that hold a spicy sauce called "sambal", which I happen to like, so no wasting here. Put the contents in a bigger jar, washed the 4 jars and they're ready to go.
While I start on the housing I'm going to have to figure out which wire out of the PCB connects to which LED eventually in the display. I took a photo of the original display and will trace the lines to get a schematic view of the different power lines.
Next time hope to have some of the housing ready and a single number display test to find out if this could actually work, since I have no clue how much power the display is using now and if that's sufficient for the upscaling I'm planning using powerful 3 mm red LED's.
Thursday, May 27, 2010
Poor Man's Nixie Clock
Hi everyone, welcome to my blog. Ever seen a Nixie clock? They are the coolest of the coolest of clocks. I instantly wanted one. But they're expensive. How about building one myself? Well, you could, you can buy a kit for about 100 euro, but it's only a real tiny clock. And I'm worried about the high voltage that the tubes use, I'm kind of inexperienced with electronics and electricity, I might kill myself...
So, why not make a clock that looks as cool as a Nixie clock but is more manageble in terms of safe use of power? That's why I want to build the poor mans Nixie clock, not cause I'm poor but because I need to find an alternative way to get the same cool clock using simple parts and low current.
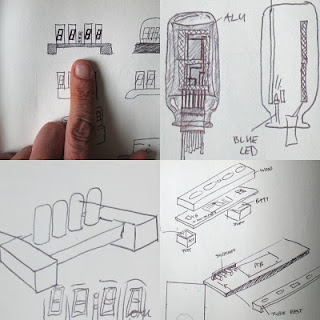
Let's get to it. I made a drawing and I'm gonna use oak wood for the housing, as well as aluminium and the tubes will have to be substituted by small jars :) In which I will put 7-segment displays which I will also make myself, don't know yet how.
Next time, handling wood and chosing a donor alarm clock.
See ya soon.
Subscribe to:
Posts (Atom)