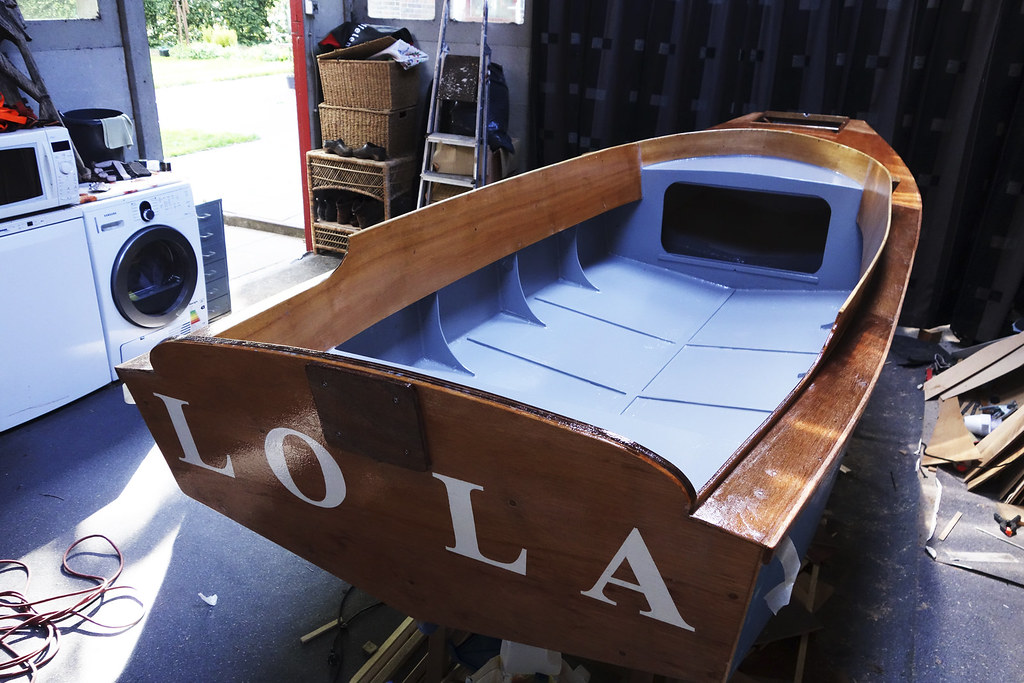
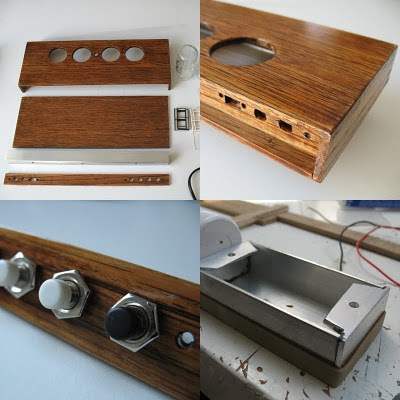
I've finally started painting the boat. Allthough the deck is far from perfect, I decided it would be nicer to show the wood instead of hiding it with paint. So the deck and coamings are in clear varnish. Interior in grey. Before that I reinforced the cockpit bottom with some slats. Still working on some deck fittings, the cleats mainly. Plan is to launch the boat in two weeks!
Showing posts with label handmade. Show all posts
Showing posts with label handmade. Show all posts
Tuesday, May 9, 2017
Thursday, March 30, 2017
Boat Update IV
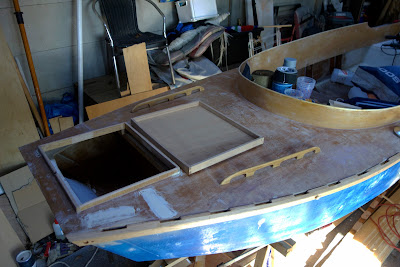
I'm currently working on the coaming top, half round wood to protect the plywood. I totally underestimated this, it was really hard to bend this half inch piece of wood into the half round shape. Have lots of sanding and filling to do. A better and faster result was creating the anchor locker. I was so pleased when I actually made the hatch and it fitted perfectly. First I made the frame that covers the anchor locker deck frame and then made a piece of plywood to fit exactly into that frame, no small feat for an amateur like me. But I was cheering when it came out so nice. :)
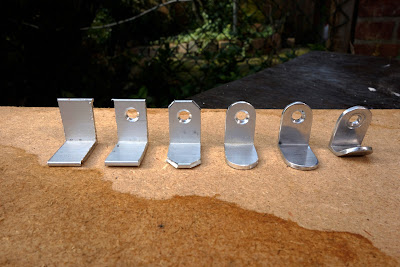
I am already thinking about some kind of boat tent or cover for spending the night or protection from rain. I need to hold some cloth around the cockpit. And I would need some small hooks on the outside of the coaming to hold bungee cord that holds the cloth down. I couldn't find any of this sort of hardware anywhere. The closest I found were these small plastic J-hooks that are fitted on kayaks. So I decided to make my own out of aluminium. And then it got me thinking, what else can I make out of aluminium? So I made a deck vent, I don't really need one, but they look cool. I hammered a wooden pole into a sheet of aluminium and bent the edges in a vise. Drilled holes, sanded it and polished it. Looks like the real deal with a sort of homemade quality to it.
Soon I'll be starting to think about paint.
Friday, May 1, 2015
French Miner's Pocket Knife Part 4: Finished
Putting everything together is a lot of fun and also a bit nervewrecking as I have spent quite some hours on this one.
The spine is now flush with the handle and sanded smooth. Putting the blade on it requires putting tension on the spring (the spine) so that the blade can be locked open or closed. The last thing to do construction wise is to hammer the pins down. As it turned out I left the pins too long and bent the pins. Very disappointing but this is a lesson to remember for next time!
Now all there is left to do is coat the knife with linseed oil and it's done! The oil does a lot, it gives the grey-light color of the ashw ood a deep brown orange shine.
Later I sharpened the blade as well, it's pretty sharp. Really pleased with the result and will sure continue making some other french knives. Thanks for watching and enjoy the final shots of this knife.

Labels:
epoxy,
folding knive,
handmade,
knife,
pocket knife,
project,
stainless,
wood
Thursday, April 30, 2015
French Miner's Pocket Knife Part 3
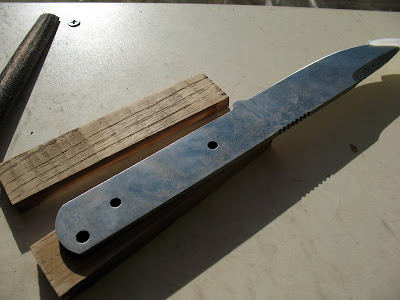
The wood has cured to the stainless steel parts, now I have to shape the wood. I used a grinding disk and hand viles. The grinding disk goes fast but it burns the wood so I use it to begin with and finish with the hand viles. At a certain point you get closer to the metal parts and the two start to merge together. I then drill holes for the metal pins and I can now begin to test fit it together to see how the overall shape will turn out. It's still too thick, more wood has to be removed for it to fit nice and comfortably in my hand.
When I get close to the final shape I wet the wood and grain will show up and protrude, you let it dry and sand off the fibers that are sticking out for a smoother finish. From now on I can just use sandpaper. I'm not worried about the top part, the spine of teh knife, it will probably need some viling to get the metal spine to sit flush with the handle pieces.
In the next part we will put everything together and finish the knife with a coat of linseed oil.
Tuesday, April 28, 2015
Leather Watch Case With Lighting Part 4: Finished
It took me about a week in total, mostly evenings, to finish this project. I'm very pleased with it I must say. Could it have been done better? Yes, especially dealing with the faux leather around corners, next time I will have to think about how to do that better. There were still some small jobs to do after it was basically done. For instance, I had to make a cover to hide the battery that powers the lighting. The acrylic sheet had a lot of scratches, which I buffed out mostly at the cost of it being no more shiny. The underside has some velt feet to keep the leather from being scratched. The closing mechanism needed some more adjusting cause I could barely open it. All in all quite some work but it was worth it. Now I can start collecting some watches! :)
Sunday, February 22, 2015
Leather Watch Case With Lighting Part 3
This is another fun part, making a latch for the case. Here's some photos of the bottom part of the latch, I forgot to make photos of the top part because I was so enthousiastic about making it :)
It's a brass plate that's cut in a way so I can fold it along the case edge. Holes are drilled for screws and the brass rod. This brass rod is used to hold a triangular wire that will clasp to the bottom part of the case. The rod is soldered to the brass plate but it also extends into the case wall to give it extra strength.
Then the parts are screwed into place and I filed the bottom rod part of the latch so the triangular piece will slide and hold easily. Very pleased with this result, it's not the cleanest looking thing but I like the handmade quality it has. Next post will show the end result of the watch case!
 | |||
| Fabricating the bottom part of the latch |
It's a brass plate that's cut in a way so I can fold it along the case edge. Holes are drilled for screws and the brass rod. This brass rod is used to hold a triangular wire that will clasp to the bottom part of the case. The rod is soldered to the brass plate but it also extends into the case wall to give it extra strength.
Then the parts are screwed into place and I filed the bottom rod part of the latch so the triangular piece will slide and hold easily. Very pleased with this result, it's not the cleanest looking thing but I like the handmade quality it has. Next post will show the end result of the watch case!
 | |
| The finished latch on the case |
Wednesday, February 11, 2015
Custom Light Box
Made a light box measuring 17 by 11 inches using MDF wood, acryllic glass and CCFL tube lights. Light box can be hung on a wall or stood on a shelf or table. Powered by a 12 volt power supply and has a dimmer to control light level.
Labels:
electronics,
handmade,
led,
light box,
photography,
plexi glass,
wood
Monday, March 25, 2013
New Skinner Knife
Hi there,
Haven't had much time to update but here's some photos from a new knife I'm working on. The handle is made from chestnut wood I've been told, here being glued up ready for shaping and sanding. On the end of the handle is gonna be a brass pipe for hanging the knife with a piece of string or leather. Be sure to see how it turns out.
Haven't had much time to update but here's some photos from a new knife I'm working on. The handle is made from chestnut wood I've been told, here being glued up ready for shaping and sanding. On the end of the handle is gonna be a brass pipe for hanging the knife with a piece of string or leather. Be sure to see how it turns out.
Saturday, November 10, 2012
Epoxy Resin Pendant
Just made a pendant for the first time for a friend. I made a crude drawing of a cat's face on paper and mixed 5 minute epoxy and poured it on top, let it dry, cut out around the resin and then same thing on the backside added with a piece of brass wire, and there you go. Instant pendant with drawing. Might have to change to slow setting epoxy to get rid of all those bubbles that come from mixing the 2 components but would drag the process to over 48 hours, if you have any ideas let me know? (apart from using vacuum that is)
Thursday, June 10, 2010
There's A Clock In Here Somewhere
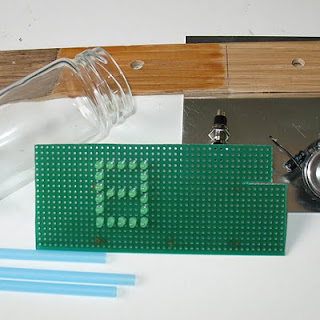
Clock 3 and 4 are underway. Number 3 is going to be a quite simple one, wooden casing with a plexiglass front and standard LED display from the donor clock. The only cool feauture of this one will be that the "alarm off" buttons will be placed under de housing, so if the alarm goes off you only have to slam the clock and it will turn the buzzer off!
Number 4 clock is still a mystery, all I know is that I want to use the glass jars again but have it done in less time. The number 2 clock took me in excess of 100 hours to make. The display could be as you see in the photo, LED's on a pcb. But I could also put them on a clear piece of plexiglass (like I did last time) and drill about 170 1mm holes. Hmmm.
Next time more about clock 3.
Monday, June 7, 2010
Finished Clock

It was exciting up until the last minute when finally all the digits lighted up properly. I didn't know if it was gonna work until I had all 4 hooked up, since they share power between them. A couple of lights didn't work at some point and drove me up the wall. I really wanted to finish it. And I have. Hope you like it.
This clock wwas featured on Hack A Day.
Tuesday, June 1, 2010
Sunday, May 30, 2010
Taking Time To Destroy A Clock

Today I did something odd. I went to buy an alarm clock and as soon as I got home, took it apart. Which was easy at first, you have the display with almost invisible LED's, there's an adapter converting 220 Volt to... something lower. There's buttons, a speaker and of course the main PCB holding the brains of the clock.
In case you want to do what I'm doing, the donor clock I'm using is a Denver EC-33, costs about 8 euro's. But I reckon you could use any alarm clock.
I realize it's not going to be easy making the display work, 4 numbers separated by jars, each needing wires to the main PCB. It's gonna be messy.
For the housing I found oak strips of wood, 4 x 35 mm and decided the width of the housing should be 3 strips wide, 105 mm.
In the supermarket I selected jars that hold a spicy sauce called "sambal", which I happen to like, so no wasting here. Put the contents in a bigger jar, washed the 4 jars and they're ready to go.
While I start on the housing I'm going to have to figure out which wire out of the PCB connects to which LED eventually in the display. I took a photo of the original display and will trace the lines to get a schematic view of the different power lines.
Next time hope to have some of the housing ready and a single number display test to find out if this could actually work, since I have no clue how much power the display is using now and if that's sufficient for the upscaling I'm planning using powerful 3 mm red LED's.
Subscribe to:
Posts (Atom)

