I'm always thinking about LED clocks, how to make an original one. I've made one a couple of years ago, it was inspired by the beautiful nixie clocks but using LED's instead of high voltage expensive nixie tubes. Now I'm still thinking about 7-segment displays (the numbers that make up a digital clock), how to make my own. It's hard to make your own using existing clock hardware. The route towards writing software and making your own pcb's is still a bit off-putting to me, but I might get to that some day. In the meantime tinkering with clock kits, trying to figure out how they work and especially what materials I like to combine them with. Here's an example, a test piece, of a LED clock in a clear housing on a wooden base. Added feature is bright yellow light lighting the clear housing (and the room) when the alarm goes off. It looks like something out of a James Bond movie, and that's what I like about it, it doesn't just show the time, it also has a dramatic housing around it, which, when I perfect the design will hopefully be a true unique and weird and wonderful clock.
Showing posts with label alarmclock. Show all posts
Friday, May 9, 2014
Thursday, June 10, 2010
Clock 3

I just cut a piece of plexiglass to fit the housing of clock 3. The back is sprayed with black paint, just enough to simulate the smoky effect but transparant enough for the red light to come through. I have to sort out the electronic part before I can fix the top of the housing to the rest. And still to do: buttons and a red led to show the alarm is on on the left of the front. The housing has already 2 holes for the switches that will double as feet allowing you to smack the clock to silence it.
There's A Clock In Here Somewhere

Clock 3 and 4 are underway. Number 3 is going to be a quite simple one, wooden casing with a plexiglass front and standard LED display from the donor clock. The only cool feauture of this one will be that the "alarm off" buttons will be placed under de housing, so if the alarm goes off you only have to slam the clock and it will turn the buzzer off!
Number 4 clock is still a mystery, all I know is that I want to use the glass jars again but have it done in less time. The number 2 clock took me in excess of 100 hours to make. The display could be as you see in the photo, LED's on a pcb. But I could also put them on a clear piece of plexiglass (like I did last time) and drill about 170 1mm holes. Hmmm.
Next time more about clock 3.
Monday, June 7, 2010
Finished Clock

It was exciting up until the last minute when finally all the digits lighted up properly. I didn't know if it was gonna work until I had all 4 hooked up, since they share power between them. A couple of lights didn't work at some point and drove me up the wall. I really wanted to finish it. And I have. Hope you like it.
This clock wwas featured on Hack A Day.
Saturday, June 5, 2010
Pieces Coming Together

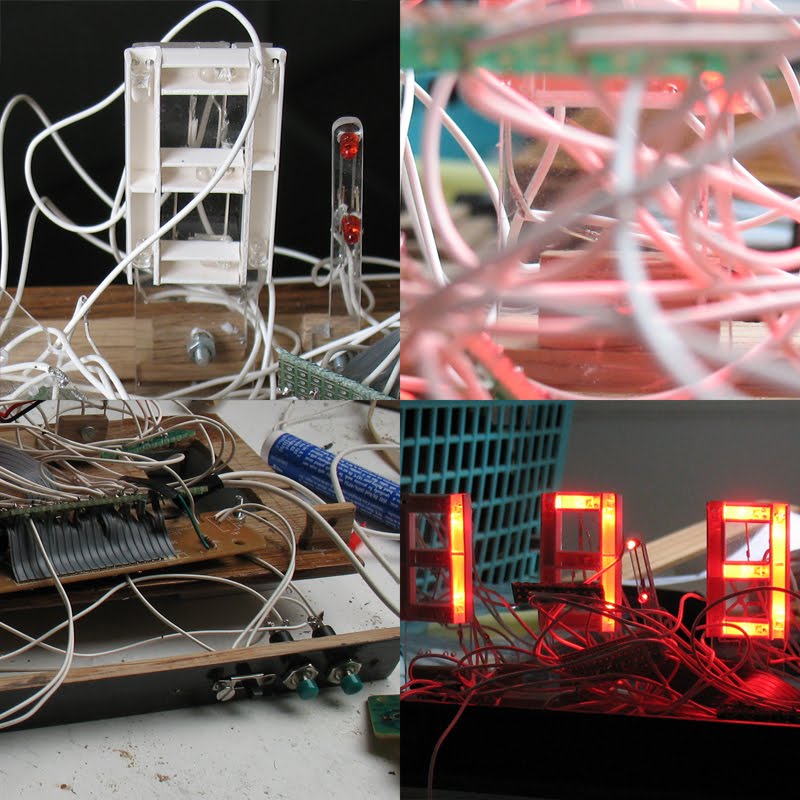
The longer I work on this clock the more difficult problems I face and also realise how daunting this task is. I made a housing but will it all fit? Will the clock actually work?
Final assembly is underway, I have to connect many many wires to the individual LED's to and fro the PCB. Some work fine but some seem like a puzzle and I have no clue why it doesn't work.
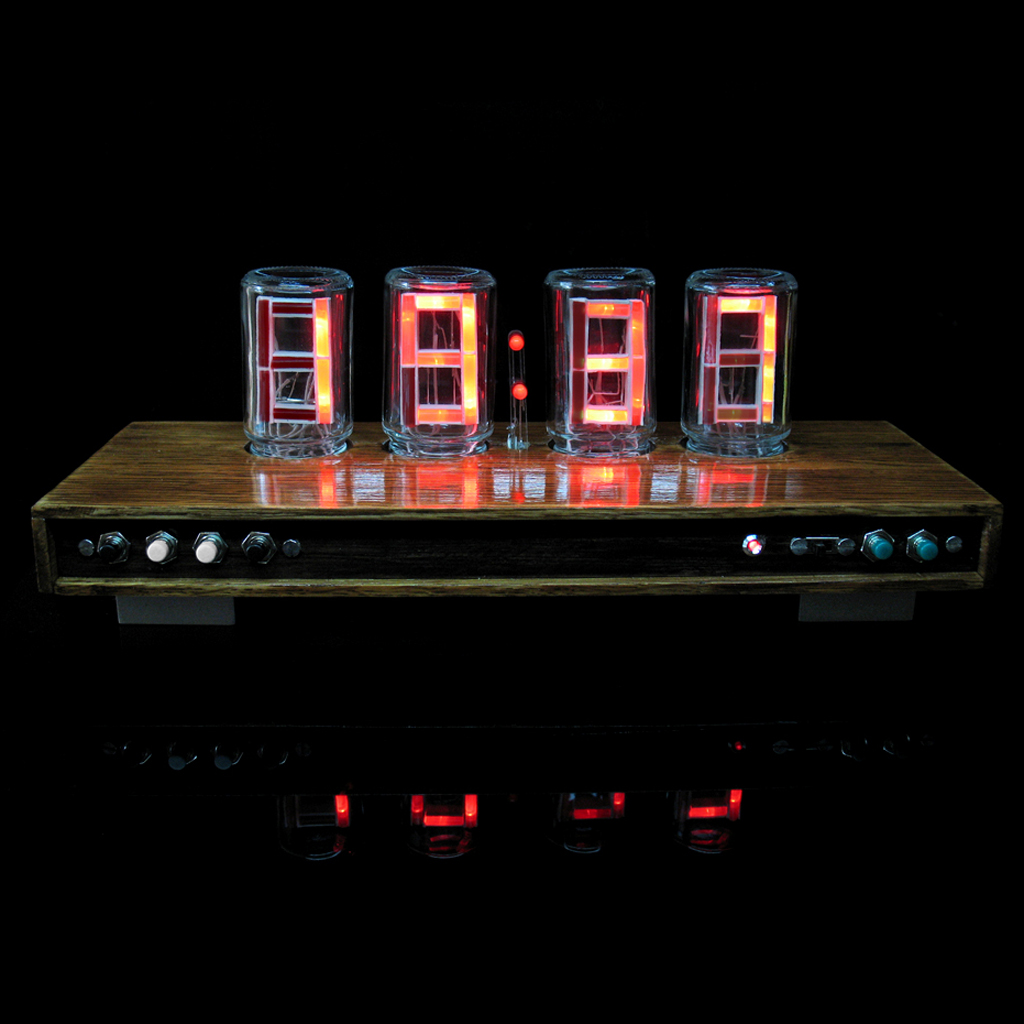
But soon it will be finished and I enjoyed it, to combine woodworking, aluminium, LED's and electronics into a working product. It has been one of the most difficult things I made, for the sheer amount of patience required, but it was well worth it I think.
Next time, proper photos of the finished alarm clock.
Subscribe to:
Comments (Atom)

