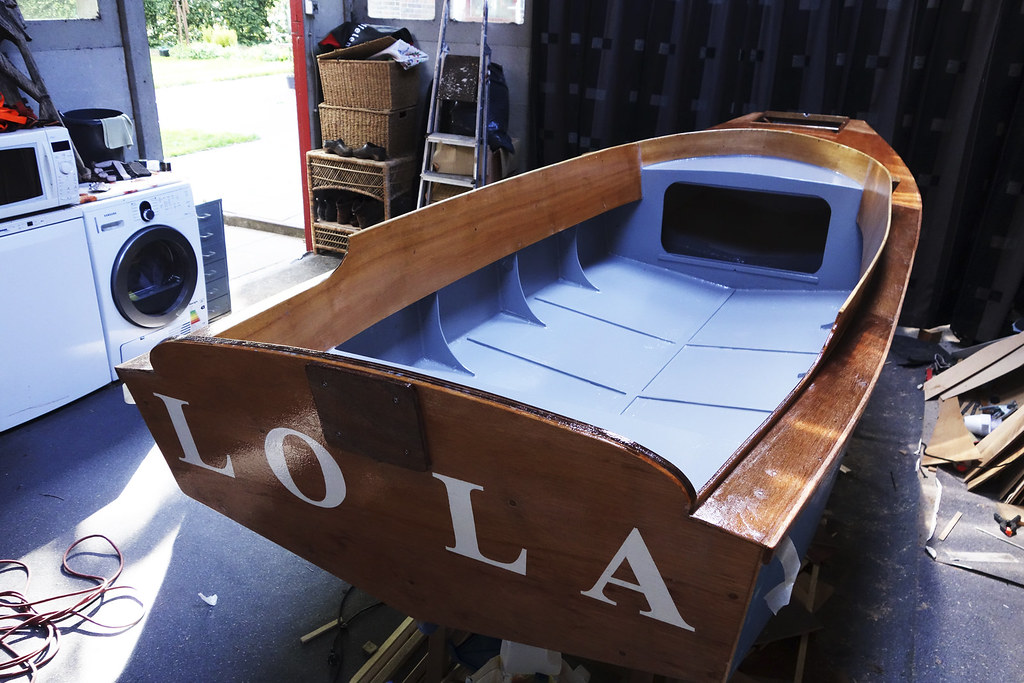
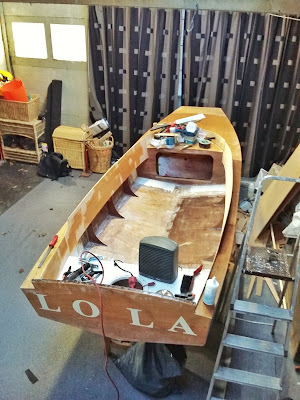
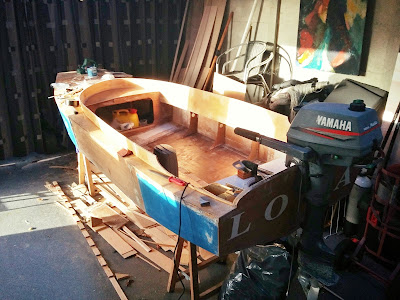
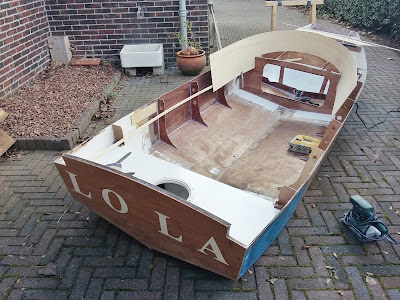
I've finally started painting the boat. Allthough the deck is far from perfect, I decided it would be nicer to show the wood instead of hiding it with paint. So the deck and coamings are in clear varnish. Interior in grey. Before that I reinforced the cockpit bottom with some slats. Still working on some deck fittings, the cleats mainly. Plan is to launch the boat in two weeks!
Showing posts with label diy. Show all posts
Showing posts with label diy. Show all posts
Tuesday, May 9, 2017
Tuesday, April 18, 2017
DIY USB Anchor Light and Foldable Anchor Ball for a Small Boat
These little side projects are so much fun. By law you need a anchor light for the night and an anchor ball for the day, if you're using the anchor. But since my boat is just a small one it becomes very important to keep these things light and easy to stow away.
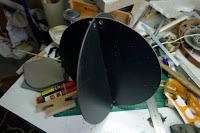
The anchor ball was quite easy to make. It's two black plastic holes with a slit cut to the center so they join together to make a ball. It folds flat and I've drilled holes in them to attach it to my flag pole.
The anchor light was a bit of a headache. First I looked around for quite a while to find a small but bright light in a housing that allows the light to be seen from 360 degrees around. I finally found such light on Ebay. It's powered with a standard USB connector, 5 volts. Which is handy cause I plan to take powerbanks and a solar charger with me on the boat.
I then cut a wooden rod in half and hollowed out the center for the power cable. Glued back together with epoxy and I have a mast with a small light at the end.
Now all I have to find out is where to put this mast on the boat. It should be removable and not permanently on the deck but I am also very hesitant to cut any holes in the deck. Need to think about that some more.
In the meantime check out the photo's of the build and the result.

Friday, December 23, 2016
Boat Update III
Winter is slowing the work on the boat a bit down. Epoxy doesn't set in low temperatures and the shed I'm using doesn't have heating. I did use a small electric heater but it's difficult to get the temperature up. As you can see I have all the main work done, side decks, fore deck and coaming. It's all a matter of fairing and filling up holes now. After that, paint and varnish :) In the second photo you can still see what the old boat used to be (the blue parts) and the new part set in between. Also, the outboard fitted to check it's low enough in the water. Can't wait to try her out.
Monday, October 10, 2016
DIY Traffic Light For Kid's Bedroom
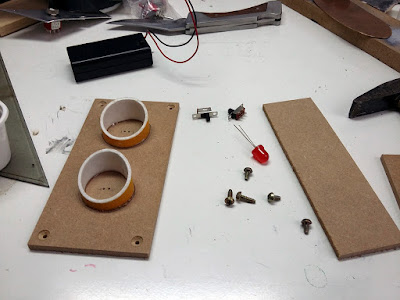
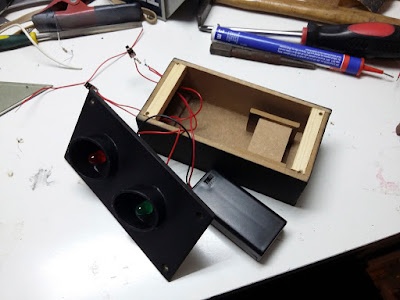
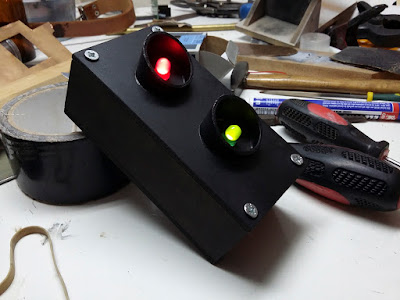
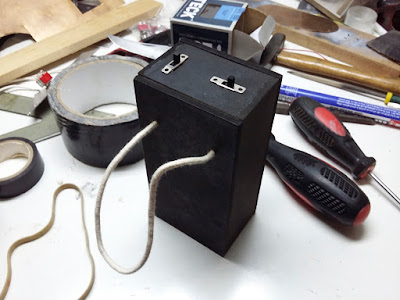
My cousin turned 8 years old and for his birthday he wanted something that could prevent his mom or anyone from entering his room without permission. Specifically, he wanted a stoplight. Naturally this appealed to my diy brain and I started working on it. I had no plan, I just wanted to make a wooden box with a red and green light, a batteryholder and a switch. Unfortunately I didn't have the right switch available so I had to mount separate switches for the red and green light. My cousin didn't bother with such technical details :)
Tuesday, October 4, 2016
Boat Update
The weather is getting colder here, autumn is upon is and thus limited time to work with epoxy. Managed to get a lot of work done, the outer hull is sealed and ready for paint, the interior needs one more coat of epoxy. After all the itchy sanding I finally had a chance to start working on the cockpit coaming, the edge around the cockpit and I like how it looks :)
Tuesday, April 12, 2016
Is Cutting a Boat in Half a Good Idea?
I built a small sailboat some years ago but it wasn't very usefeul. Cause it was too small for me. So I was thinking of building a new boat, from scratch. But then I thought, wait a minute, why not just make the boat I have a little bit bigger? There's all sorts of issues with that idea but nevertheless I'm going to try it against better judgment :) Here's the start of that project, after I had cut the boat in half, using stitch and glue technique to extend the boat by 4 feet. You will see in this blog in the coming months wether this was a good idea or not.
Friday, April 8, 2016
Friday, April 1, 2016
Thursday, April 30, 2015
French Miner's Pocket Knife Part 3
The wood has cured to the stainless steel parts, now I have to shape the wood. I used a grinding disk and hand viles. The grinding disk goes fast but it burns the wood so I use it to begin with and finish with the hand viles. At a certain point you get closer to the metal parts and the two start to merge together. I then drill holes for the metal pins and I can now begin to test fit it together to see how the overall shape will turn out. It's still too thick, more wood has to be removed for it to fit nice and comfortably in my hand.
When I get close to the final shape I wet the wood and grain will show up and protrude, you let it dry and sand off the fibers that are sticking out for a smoother finish. From now on I can just use sandpaper. I'm not worried about the top part, the spine of teh knife, it will probably need some viling to get the metal spine to sit flush with the handle pieces.
In the next part we will put everything together and finish the knife with a coat of linseed oil.
Saturday, March 29, 2014
Custom Leather Case Part 6
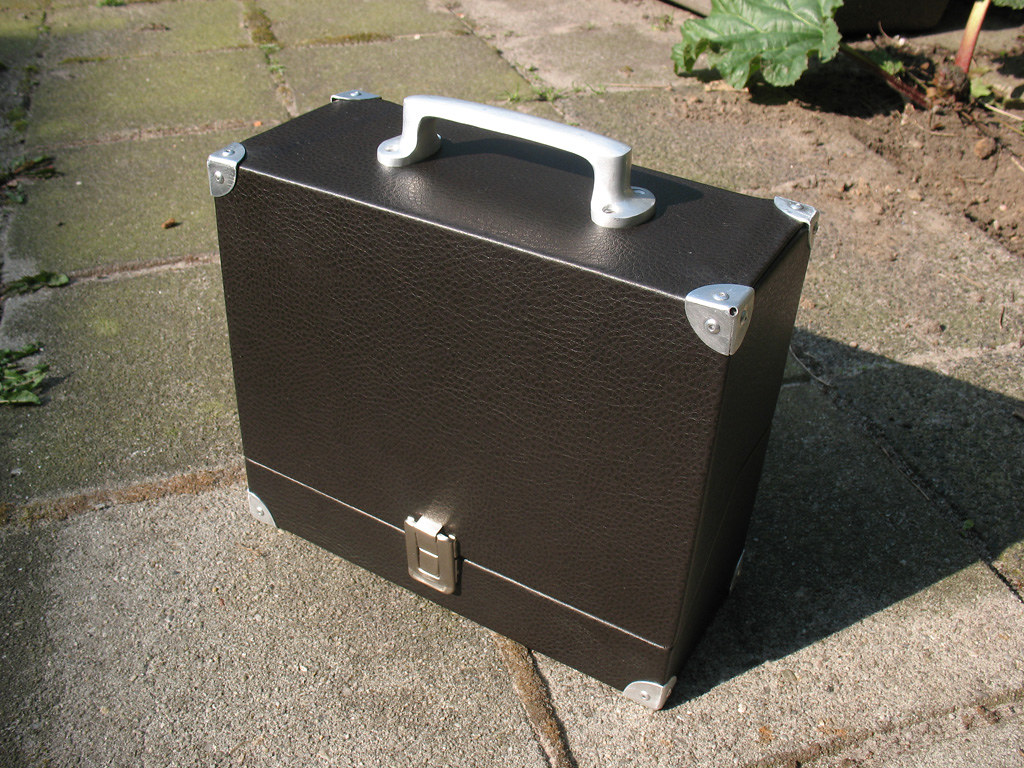
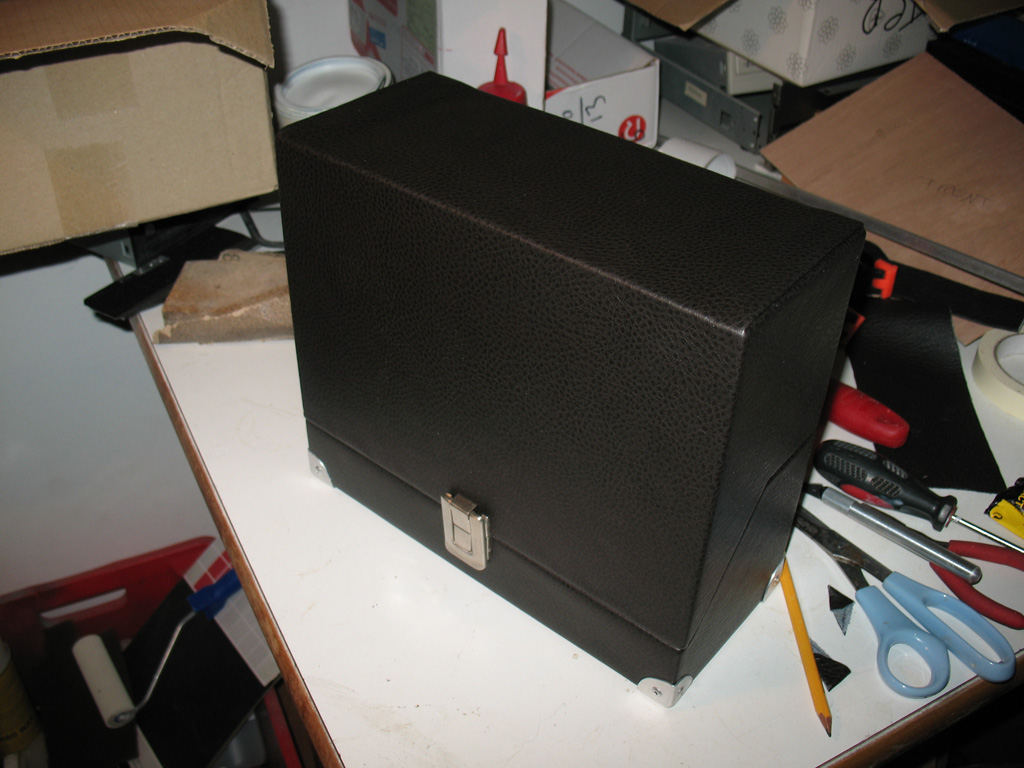
It's finished! This was way more work than I anticipated, as always :) Especially the leather and felt part took some time getting used to working with. Now I need to find some use for the case, I'll show that as well when I figure it out. Here are some shots of the finished result and thanks for watching. Barry


Thursday, March 27, 2014
Custom Leather Case Part 5
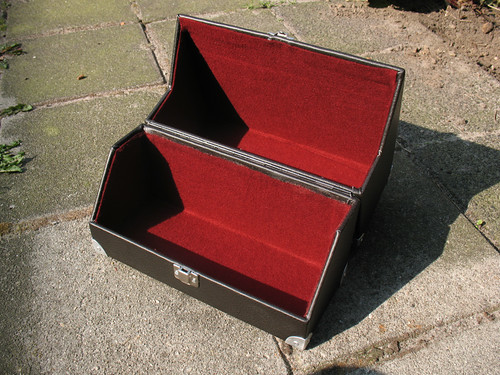
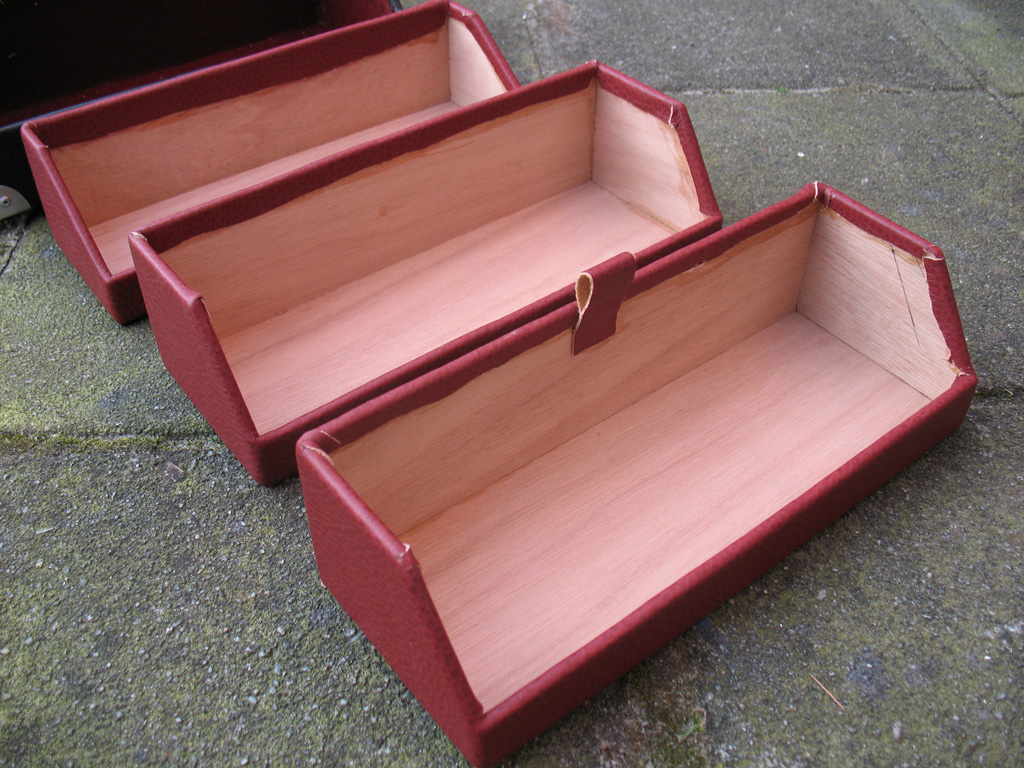
Just a short update today. I've covered the inside trays of the case with red leather as you can see from the pictures. After this I will cover the inside of the trays with black felt. Also got an aluminium handle, have to install it yet as I'm trying to figure out if the bolts that will hold the handle will clear the trays when the lid is closed. Tomorrow, perhaps the case will be completely done. Stay tuned.
Tuesday, March 25, 2014
Custom Leather Case Part 4
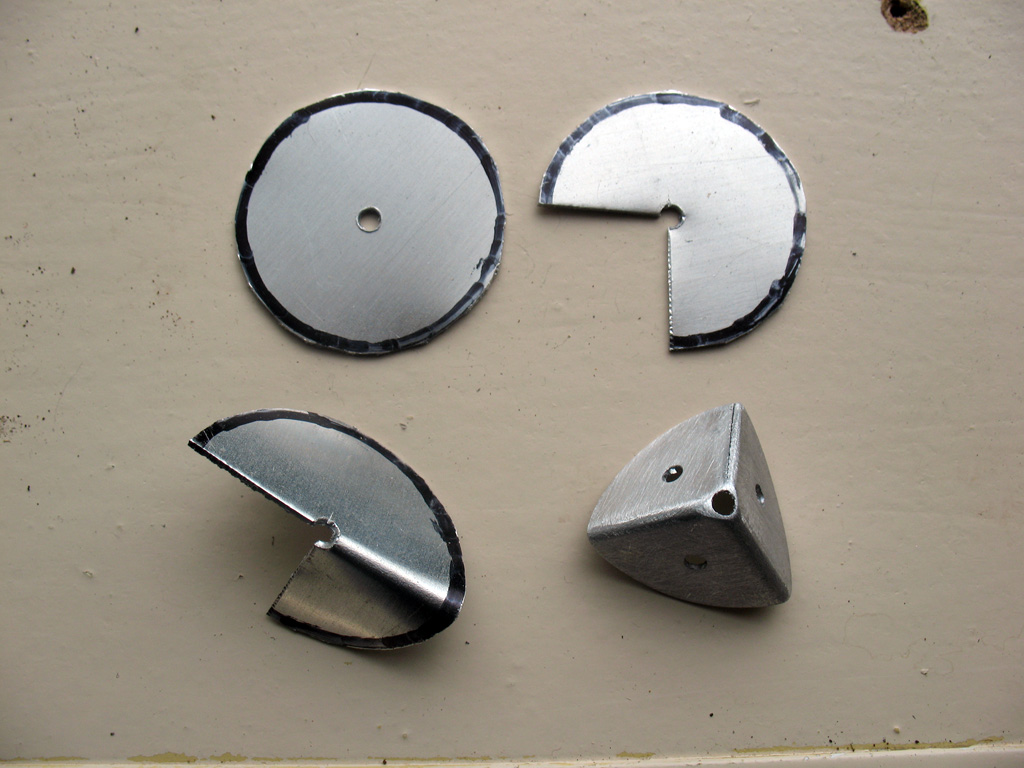
I've spent about 4 days building this case now, in hours, maybe 20. I know, it sounds like a lot. Some of it is due to mistakes you're bound to make when you do this sort of thing for the first time. Cutting wood is a time consuming job, again sometimes due to mistakes having to cut things twice, but haven't lost a lot of wood to the bin yet. Since all the wood is covered you can get away with a lot of bad cuts and rough edges. Making the 8 corner protectors was quite some work, maybe 1,5 hours, cutting disc shapes out of aluminium using scissors, drilling 4 holes, bending the piece, sanding it. Moneywise, spent about 25 euro (32 dollars?), leather and felt being the most expensive part, used a lot of glue also, about 5 euro worth. Wood was 5 euro as well. Aluminium sheet I still had in storage as well as rivets.
Note to self, try to slow down a bit. Today I wanted to fit the first pieces of red felt but hadn't thought it through and ran into trouble when having to remove felt after it was glued down, not a pretty sight I tell you.
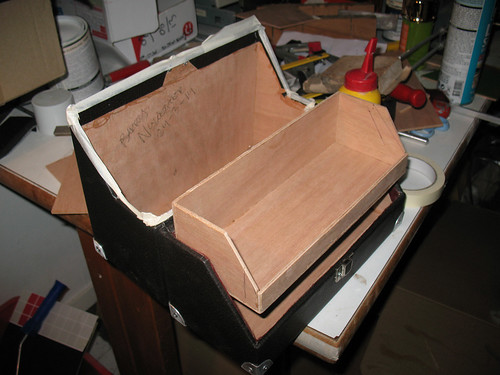
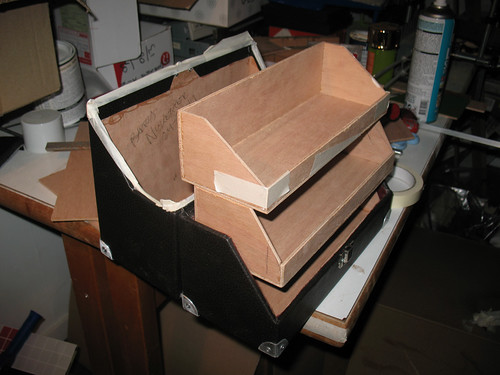
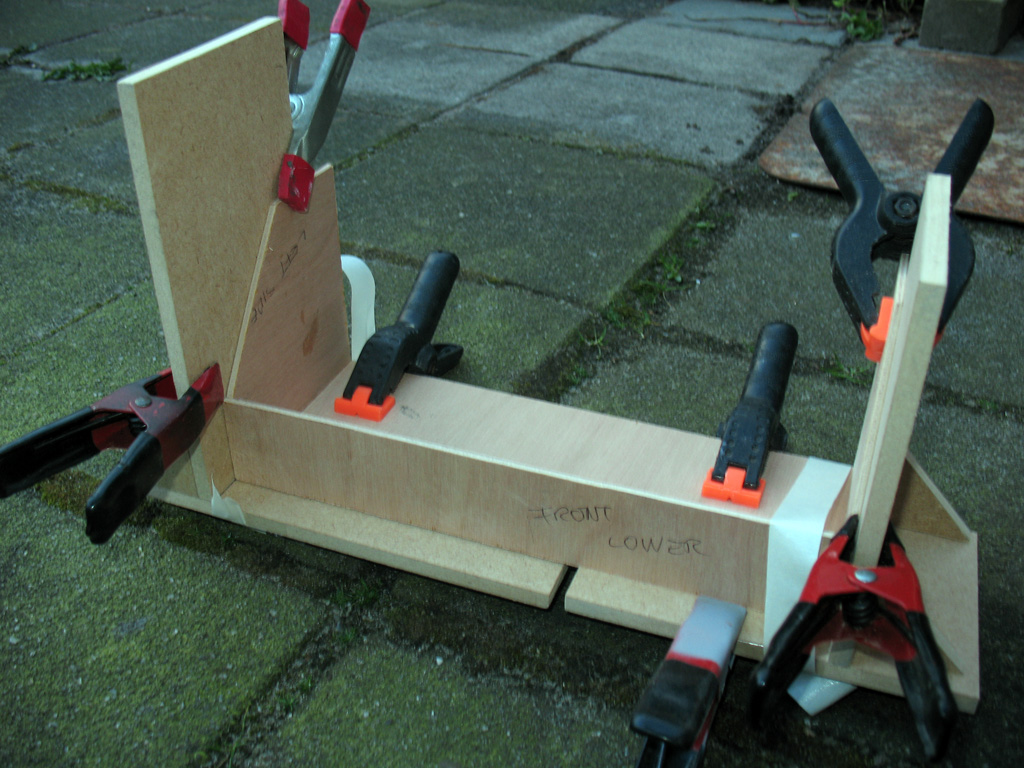
Anyway, today also started on the inner trays that the case will hold, 3 of them. And immediately ran into a small problem. I had envisioned 3 equal trays, however, due to the way the lid closes there wasn't enough room to make 3 equal ones that are stackable. So the top one will be a little bit different to allow the case to be able to close. Same procedure as the case, glue multiplex wood together to form a box. I use 90 degree angle shaped pieces of wood to keep pieces in the correct allignment when drying, using clamps. Using painter's tape also helps a lot to keep some tension on keeping pieces stuck together while drying.
You may be wondering why I haven't put felt in the top part of the case yet, that's because I still have to decide about a handle that will need to be fixed to the top and also I might need some kind of foam in there that will keep my trays from bouncing around when the case is closed.
Here are the results of today. Hope you enjoy this build, I certainly am :)
Custom Leather Case Part 3
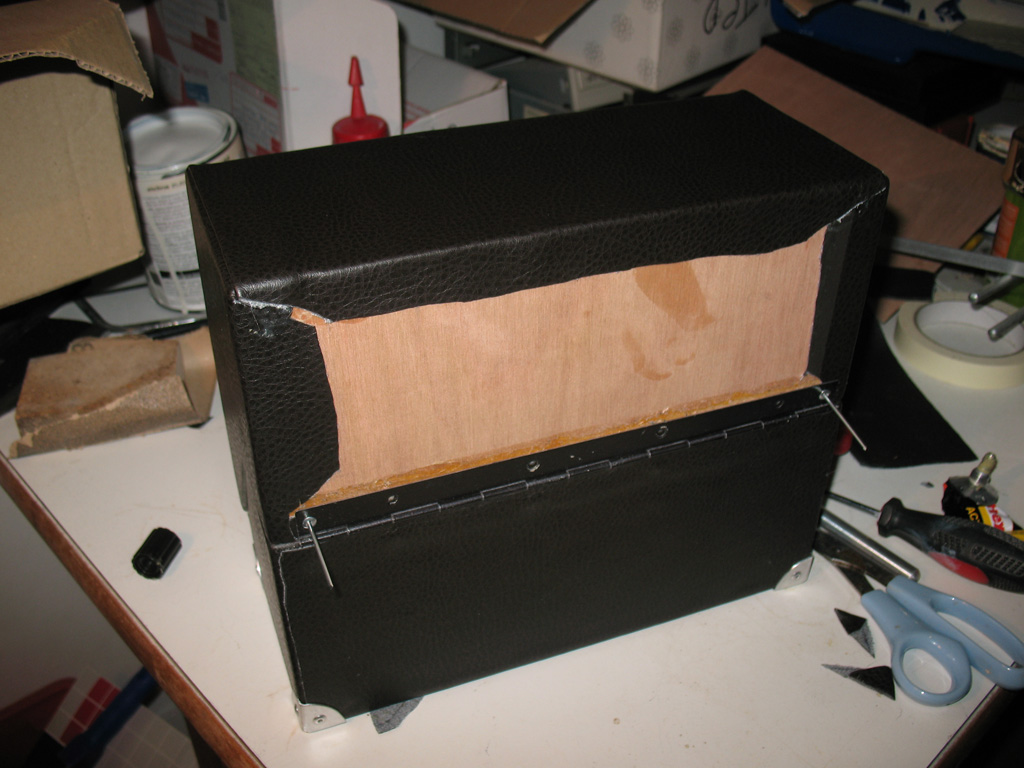
Glueing the leather on the top part of the case went far easier than the bottom half, guess I'm getting the hang of it now. What is still quite hard to figure out, is how you cover the leather over your part in the least amount of pieces. You want it to look smooth around the corners without separate pieces of leather being glued on top of eachother. It should be possible to do the whole half with one piece of leather but I haven't, partly cause my piece of leather wasn't large enough, so keep that in mind. As a result of this I have to glue a separate piece of leather that will cover the back. As it's the back it's not that big of a deal but I wish I had planned a little bit better. Well, next time will use what I have learnt. So this is what I have now, bottom and top and ready to join them together. I will join the two parts first before I cover the back with leather and hide those rivets.
After securing the two halves together I went looking for a locking mechanism. Not only will this hold the two halves together it also allows you to align both pieces, as in my case they didn't line up properly. And since eventually there will be a handle on the top part, the mechanism should hold the weight of it's contents, keep that in mind. I found a locking mechanism on an old suitcase and bolted it to my new case. Apart from the leather on the back, the front looks very professional :)
While that was drying I started on the last 4 corner protectors, I have 2 done at this point as I'm writing this. I haven't got an idea yet how to fix a handle on top or what to make it from. And of course the inside needs to be covered with fabric. After all that is done I will need to construct some boxes that will fit inside the case. I was thinking of making 3 open boxes that stack on top of eachother, maybe cover those in red leather for a classy look. But for now I leave you with a view of the inside and 2 pieces of felt that will cover the entire inside of the case, I think I will go for the red one.
Monday, March 24, 2014
Custom Leather Case Part 2
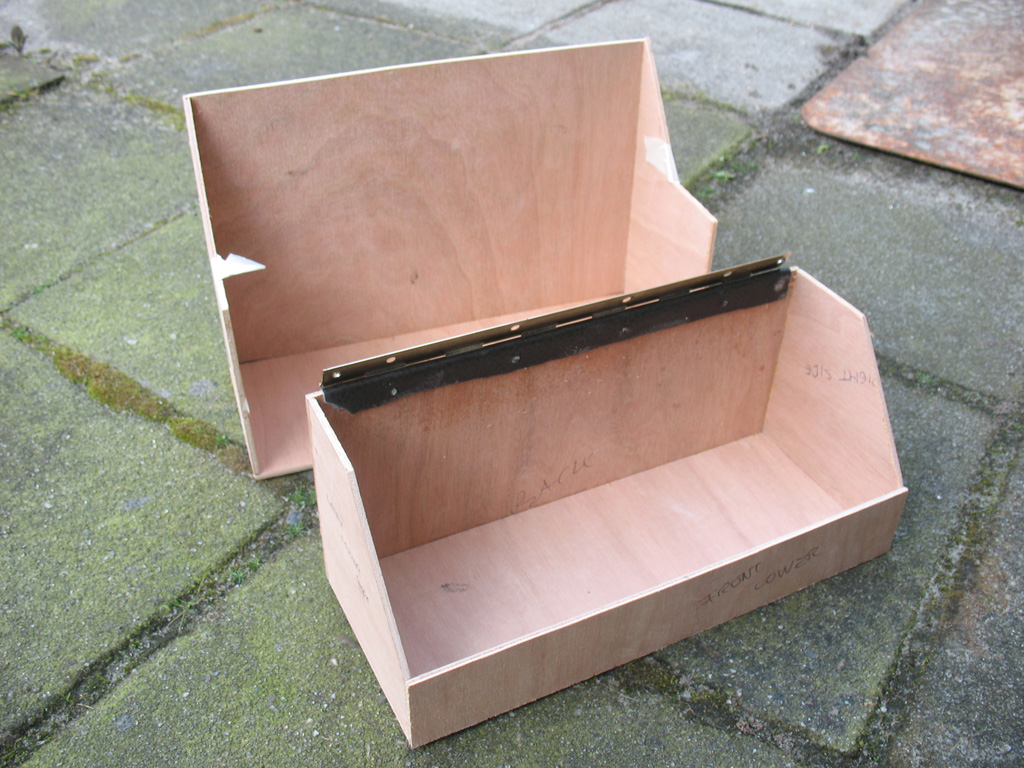
So the two halves have been glued. I need to mention that you're supposed to glue the whole box together and THEN cut it in two halves, but I don't have a japanese saw to do that. So I had to build the two halfs separately. When the bottom piece was dry I added a piece of leather where the piano hinge is gonna be, this way I get a nice leather rim on the inisde where the hinge meets the wood. Here's what I ended up with.
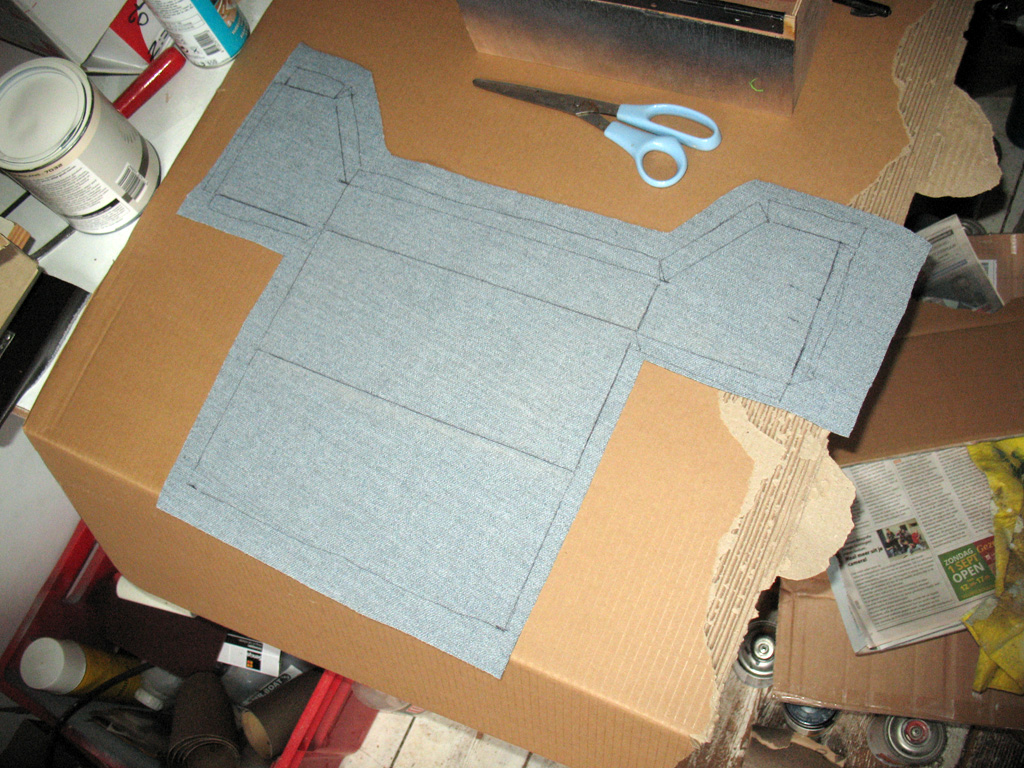
Next I placed the bottom part on a piece of dark brown "faux" leather and marked all the sides by laying the part on it's sides one at a time and ended up with this:
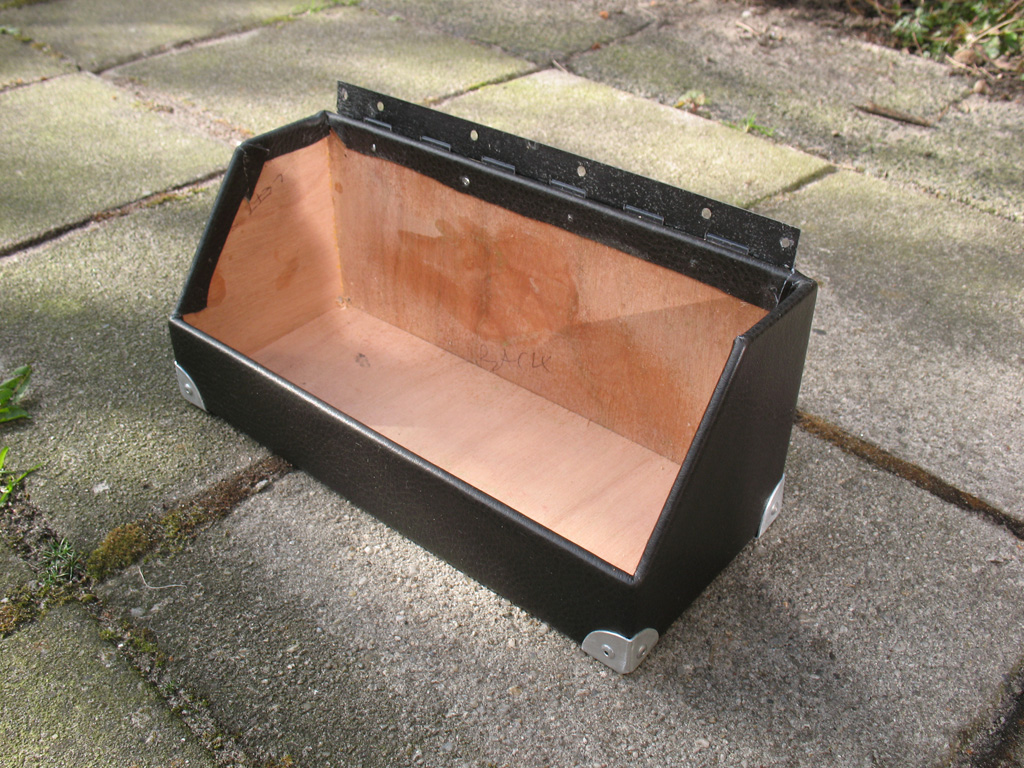
Next came the hard part, glueing the leather on. I used a contact glue, put glue on both sides and let it rest for 10 minutes, then stick them together. It's best, as I found out later, to glue one side at a time and let it dry, then cut the excess off and make cuts in the corners to allow folding of the leather to the inside of the box. As soon as I had the bottom box done I installed the aluminium corner protection pieces I had made before, using rivets. Doesn't look bad at all. Next time, top box assembly and putting the two halves together.
Sunday, March 23, 2014
Custom Leather Case Part 1
I saw Adam Savage from Mythbuster's on Tested doing a one-day-build and he built a gun case for his Bladerunner weapon replica. This was an awesome build and I always wanted to do something like this. Not for any particularl item but a case that has some boxes inside to store valuable items.
So here we go. I've made a simple drawing of a case, it has a leather outside and felt inside. It needs a opening and closing mechanism and the corners should be protected, edge protectors like cases usually have.
I started with some pieces of plywood (3.6 mm) for all the sides (the case will be 27x22x10 cm).
Then I cut the sides in half, so I can build the two sides of the case, then glued the parts together.
While that's drying I found some aluminium I can use for the 8 edge protectors and started making one.
Check out the progress on this build the next time as I try to make the two halves come together and start working with leather and a piano-hinge.
Barry
Thursday, June 10, 2010
There's A Clock In Here Somewhere
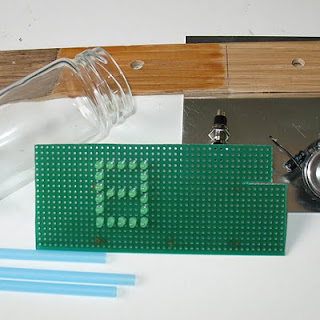
Clock 3 and 4 are underway. Number 3 is going to be a quite simple one, wooden casing with a plexiglass front and standard LED display from the donor clock. The only cool feauture of this one will be that the "alarm off" buttons will be placed under de housing, so if the alarm goes off you only have to slam the clock and it will turn the buzzer off!
Number 4 clock is still a mystery, all I know is that I want to use the glass jars again but have it done in less time. The number 2 clock took me in excess of 100 hours to make. The display could be as you see in the photo, LED's on a pcb. But I could also put them on a clear piece of plexiglass (like I did last time) and drill about 170 1mm holes. Hmmm.
Next time more about clock 3.
Monday, June 7, 2010
Finished Clock

It was exciting up until the last minute when finally all the digits lighted up properly. I didn't know if it was gonna work until I had all 4 hooked up, since they share power between them. A couple of lights didn't work at some point and drove me up the wall. I really wanted to finish it. And I have. Hope you like it.
This clock wwas featured on Hack A Day.
Tuesday, June 1, 2010
Sunday, May 30, 2010
Taking Time To Destroy A Clock

Today I did something odd. I went to buy an alarm clock and as soon as I got home, took it apart. Which was easy at first, you have the display with almost invisible LED's, there's an adapter converting 220 Volt to... something lower. There's buttons, a speaker and of course the main PCB holding the brains of the clock.
In case you want to do what I'm doing, the donor clock I'm using is a Denver EC-33, costs about 8 euro's. But I reckon you could use any alarm clock.
I realize it's not going to be easy making the display work, 4 numbers separated by jars, each needing wires to the main PCB. It's gonna be messy.
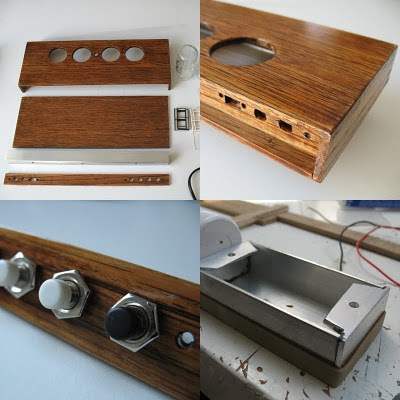
For the housing I found oak strips of wood, 4 x 35 mm and decided the width of the housing should be 3 strips wide, 105 mm.
In the supermarket I selected jars that hold a spicy sauce called "sambal", which I happen to like, so no wasting here. Put the contents in a bigger jar, washed the 4 jars and they're ready to go.
While I start on the housing I'm going to have to figure out which wire out of the PCB connects to which LED eventually in the display. I took a photo of the original display and will trace the lines to get a schematic view of the different power lines.
Next time hope to have some of the housing ready and a single number display test to find out if this could actually work, since I have no clue how much power the display is using now and if that's sufficient for the upscaling I'm planning using powerful 3 mm red LED's.
Thursday, May 27, 2010
Poor Man's Nixie Clock
Hi everyone, welcome to my blog. Ever seen a Nixie clock? They are the coolest of the coolest of clocks. I instantly wanted one. But they're expensive. How about building one myself? Well, you could, you can buy a kit for about 100 euro, but it's only a real tiny clock. And I'm worried about the high voltage that the tubes use, I'm kind of inexperienced with electronics and electricity, I might kill myself...
So, why not make a clock that looks as cool as a Nixie clock but is more manageble in terms of safe use of power? That's why I want to build the poor mans Nixie clock, not cause I'm poor but because I need to find an alternative way to get the same cool clock using simple parts and low current.
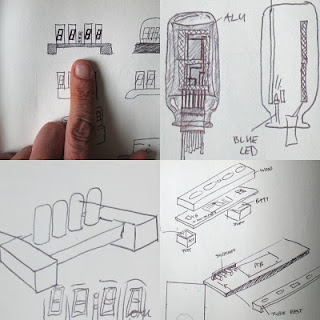
Let's get to it. I made a drawing and I'm gonna use oak wood for the housing, as well as aluminium and the tubes will have to be substituted by small jars :) In which I will put 7-segment displays which I will also make myself, don't know yet how.
Next time, handling wood and chosing a donor alarm clock.
See ya soon.
Subscribe to:
Comments (Atom)

