Showing posts with label led. Show all posts
Saturday, October 14, 2017
Tiny Bandai Millennium Falcon Build II
Using 3d software to create the background image that will be incoprporated in the Bespin diorama as a lightbox. Will act as a backdrop and lightsource for the millennium falcon sitting on it's platform.
Labels:
led,
light box,
millennium falcon,
scale model,
Star Wars
Tuesday, May 9, 2017
Tiny Bandai Millennium Falcon Build I
I've started a new scale model build as a youtube video series. In part 1 I'm starting to add landing gears to the tiny model and to my amazement find small enough optic fibers (and a matching 0.25 mm drill bit) to attempt lighting this true small but very detailed minature.
Labels:
Bandai,
brass,
led,
millennium falcon,
scale model,
Star Wars,
youtube
Tuesday, April 18, 2017
DIY USB Anchor Light and Foldable Anchor Ball for a Small Boat
These little side projects are so much fun. By law you need a anchor light for the night and an anchor ball for the day, if you're using the anchor. But since my boat is just a small one it becomes very important to keep these things light and easy to stow away.
The anchor ball was quite easy to make. It's two black plastic holes with a slit cut to the center so they join together to make a ball. It folds flat and I've drilled holes in them to attach it to my flag pole.
The anchor light was a bit of a headache. First I looked around for quite a while to find a small but bright light in a housing that allows the light to be seen from 360 degrees around. I finally found such light on Ebay. It's powered with a standard USB connector, 5 volts. Which is handy cause I plan to take powerbanks and a solar charger with me on the boat.
I then cut a wooden rod in half and hollowed out the center for the power cable. Glued back together with epoxy and I have a mast with a small light at the end.
Now all I have to find out is where to put this mast on the boat. It should be removable and not permanently on the deck but I am also very hesitant to cut any holes in the deck. Need to think about that some more.
In the meantime check out the photo's of the build and the result.

Thursday, February 9, 2017
How To Destroy a Y-Wing
In my latest youtube series I'm building a Star Wars Deathstar Trench diorama with a Y-wing exploding, just as we saw in the first Star Wars movie (A New Hope). For me what was interesting about this was all the elements coming together, the model, the diorama, the lighting and painting. Because these Bandai models are so small it's less time consuming to do all of this. I don't know how much time I spent on this sofar, but I don't expect it to exceed 100 hours.
The diorama was pretty straightforward, built using pieces of wood and parts from a tank kit. The Y-wing model because it is so incredibly detailed was easy to build. However, the explosion part was a real headache, I tried all kinds of materials, foam, caulk, styrofoam, cotton. I finally got the best results soaking cotton in wallpaper glue and sculpting a cloud like shape.
If you'd like to follow me build this, please watch the youtube series:
Monday, October 10, 2016
DIY Traffic Light For Kid's Bedroom
My cousin turned 8 years old and for his birthday he wanted something that could prevent his mom or anyone from entering his room without permission. Specifically, he wanted a stoplight. Naturally this appealed to my diy brain and I started working on it. I had no plan, I just wanted to make a wooden box with a red and green light, a batteryholder and a switch. Unfortunately I didn't have the right switch available so I had to mount separate switches for the red and green light. My cousin didn't bother with such technical details :)
Tuesday, April 28, 2015
Leather Watch Case With Lighting Part 4: Finished
It took me about a week in total, mostly evenings, to finish this project. I'm very pleased with it I must say. Could it have been done better? Yes, especially dealing with the faux leather around corners, next time I will have to think about how to do that better. There were still some small jobs to do after it was basically done. For instance, I had to make a cover to hide the battery that powers the lighting. The acrylic sheet had a lot of scratches, which I buffed out mostly at the cost of it being no more shiny. The underside has some velt feet to keep the leather from being scratched. The closing mechanism needed some more adjusting cause I could barely open it. All in all quite some work but it was worth it. Now I can start collecting some watches! :)
Sunday, February 22, 2015
Leather Watch Case With Lighting Part 3
This is another fun part, making a latch for the case. Here's some photos of the bottom part of the latch, I forgot to make photos of the top part because I was so enthousiastic about making it :)
It's a brass plate that's cut in a way so I can fold it along the case edge. Holes are drilled for screws and the brass rod. This brass rod is used to hold a triangular wire that will clasp to the bottom part of the case. The rod is soldered to the brass plate but it also extends into the case wall to give it extra strength.
Then the parts are screwed into place and I filed the bottom rod part of the latch so the triangular piece will slide and hold easily. Very pleased with this result, it's not the cleanest looking thing but I like the handmade quality it has. Next post will show the end result of the watch case!
![]() | |||
| Fabricating the bottom part of the latch |
It's a brass plate that's cut in a way so I can fold it along the case edge. Holes are drilled for screws and the brass rod. This brass rod is used to hold a triangular wire that will clasp to the bottom part of the case. The rod is soldered to the brass plate but it also extends into the case wall to give it extra strength.
Then the parts are screwed into place and I filed the bottom rod part of the latch so the triangular piece will slide and hold easily. Very pleased with this result, it's not the cleanest looking thing but I like the handmade quality it has. Next post will show the end result of the watch case!
![]() | |
| The finished latch on the case |
Thursday, February 19, 2015
Leather Watch Case With Lighting Part 2
As soon as the lid was covered in leather I stuck a led strip on the inside and saw how it looked, it's perfect, it highlights the watch and the led strip remains hidden from view.
I continued with applying leather to the case and cut a piece of acryllic glass to fit the window. I will also need to maken some dividers in the case to give the watches each it's indivual place that will hold it in place also. The watches will be supported each with a piece of foam that I need to shape like a wrist. Next post I'll be attaching the lid to the case with hinges and we can start filling the case with dividers.
![]() |
| Trying out the lighting |
![]() |
| Lid has glass and lighting installed |
![]() |
| Almost done covering the case in leather |
Wednesday, February 18, 2015
Leather Watch Case With Lighting Part 1
I've recently got bitten by the watch bug :) Haven't worn a watch since my childhood but after I got me a Casio watch for work I got obesessed with them and ordered some unusual ones on Ebay. Needless to say I need to get a home for my future watch collection. What better way then to make a watch case yourself.
I used a wine gift box, it's about a foot long, 4 inches high. It has a piece of wood that slides to close the box. I glued this in place cause I need the top to be closed. I then cut the box length wise to make the bottom part of the case, about 2 inches high. I then cut the remaining part again to get a thin top. Then a window was cut out through which we will be able to see the watches. Faux leather was then glued to the lid to create a nice look that is associated with watches and jewelry. On the inside of the lid there's just enough room for a strip of led lights, which I will show in the next post.
![]() |
| Wine box cut in pieces |
![]() |
| Case and lid with window |
![]() |
| Starting to glue leather to lid |
Wednesday, February 11, 2015
Custom Light Box
Made a light box measuring 17 by 11 inches using MDF wood, acryllic glass and CCFL tube lights. Light box can be hung on a wall or stood on a shelf or table. Powered by a 12 volt power supply and has a dimmer to control light level.
Labels:
electronics,
handmade,
led,
light box,
photography,
plexi glass,
wood
Tuesday, February 10, 2015
Illuminated Photo Frame
I'm experimenting with illuminated photo frames. Inside this standard deep photo frame are LED's that light up a backlit photo print. Runs on 12 volts and has a dimmer to control the light level. Hopefully soon available on my Etsy page
Photo by Renee Rozenveld
Friday, May 9, 2014
Weird LED Clock
I'm always thinking about LED clocks, how to make an original one. I've made one a couple of years ago, it was inspired by the beautiful nixie clocks but using LED's instead of high voltage expensive nixie tubes. Now I'm still thinking about 7-segment displays (the numbers that make up a digital clock), how to make my own. It's hard to make your own using existing clock hardware. The route towards writing software and making your own pcb's is still a bit off-putting to me, but I might get to that some day. In the meantime tinkering with clock kits, trying to figure out how they work and especially what materials I like to combine them with. Here's an example, a test piece, of a LED clock in a clear housing on a wooden base. Added feature is bright yellow light lighting the clear housing (and the room) when the alarm goes off. It looks like something out of a James Bond movie, and that's what I like about it, it doesn't just show the time, it also has a dramatic housing around it, which, when I perfect the design will hopefully be a true unique and weird and wonderful clock.
Tuesday, May 28, 2013
Scale Model Titanic Sinking
Started something different just for fun. Got a 1/1200 scale model of
Titanic and planning something ambitious. The idea is this model
Titanic is sinking in a resin semi clear ocean while breaking up and
illuminated from the inside. Because of the clear ocean this model can
be viewed from both under water and above the surface. Here's some first
pics.
Thursday, November 8, 2012
New Experiment
Thursday, June 10, 2010
Clock 3

I just cut a piece of plexiglass to fit the housing of clock 3. The back is sprayed with black paint, just enough to simulate the smoky effect but transparant enough for the red light to come through. I have to sort out the electronic part before I can fix the top of the housing to the rest. And still to do: buttons and a red led to show the alarm is on on the left of the front. The housing has already 2 holes for the switches that will double as feet allowing you to smack the clock to silence it.
Monday, June 7, 2010
Finished Clock

It was exciting up until the last minute when finally all the digits lighted up properly. I didn't know if it was gonna work until I had all 4 hooked up, since they share power between them. A couple of lights didn't work at some point and drove me up the wall. I really wanted to finish it. And I have. Hope you like it.
This clock wwas featured on Hack A Day.
Saturday, June 5, 2010
Pieces Coming Together

The longer I work on this clock the more difficult problems I face and also realise how daunting this task is. I made a housing but will it all fit? Will the clock actually work?
Final assembly is underway, I have to connect many many wires to the individual LED's to and fro the PCB. Some work fine but some seem like a puzzle and I have no clue why it doesn't work.
But soon it will be finished and I enjoyed it, to combine woodworking, aluminium, LED's and electronics into a working product. It has been one of the most difficult things I made, for the sheer amount of patience required, but it was well worth it I think.
Next time, proper photos of the finished alarm clock.
Tuesday, June 1, 2010
Sunday, May 30, 2010
Taking Time To Destroy A Clock

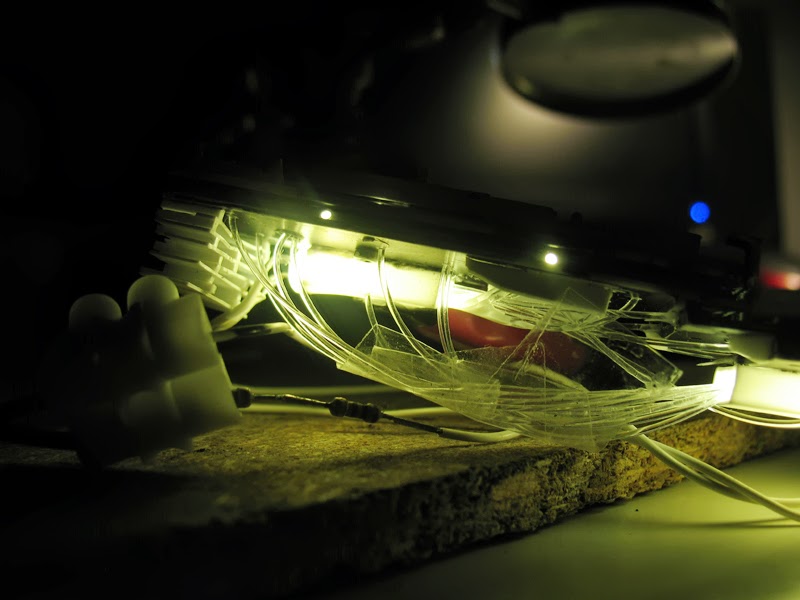
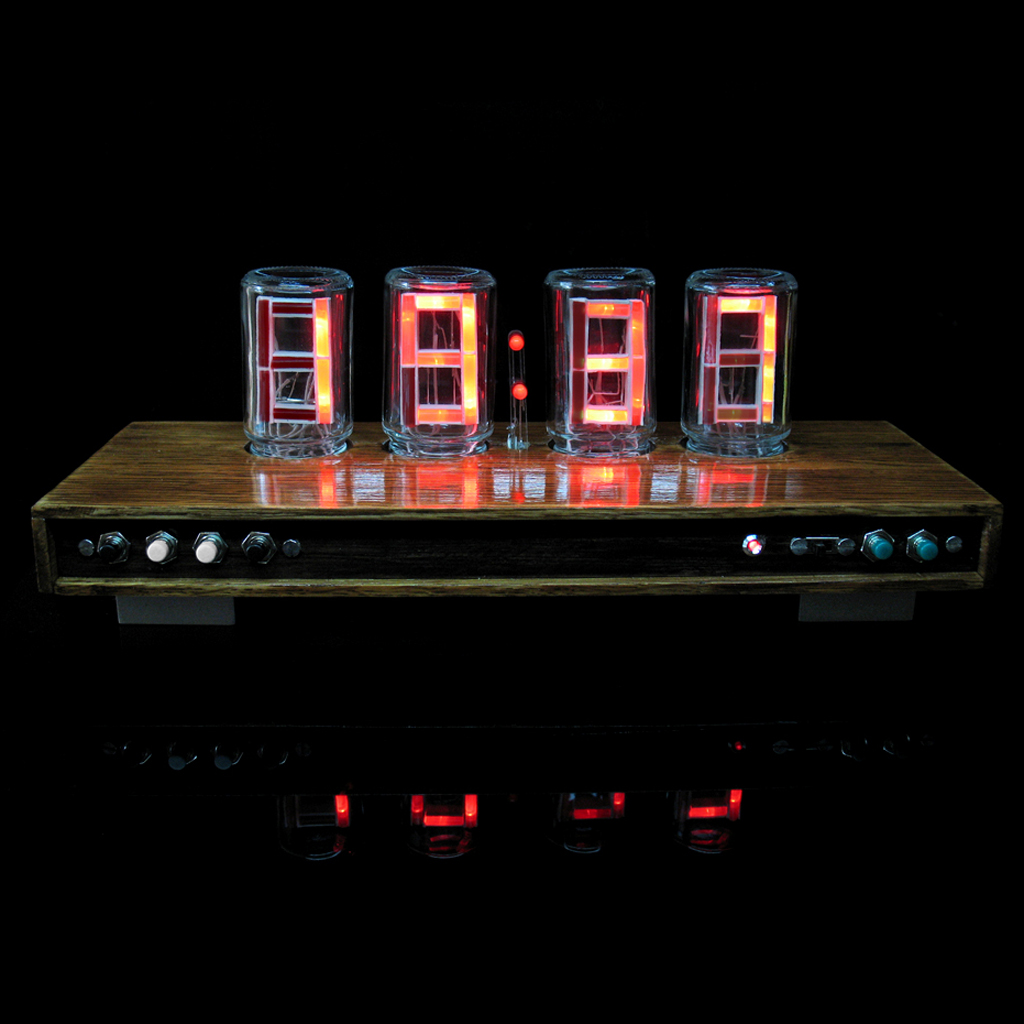
Today I did something odd. I went to buy an alarm clock and as soon as I got home, took it apart. Which was easy at first, you have the display with almost invisible LED's, there's an adapter converting 220 Volt to... something lower. There's buttons, a speaker and of course the main PCB holding the brains of the clock.
In case you want to do what I'm doing, the donor clock I'm using is a Denver EC-33, costs about 8 euro's. But I reckon you could use any alarm clock.
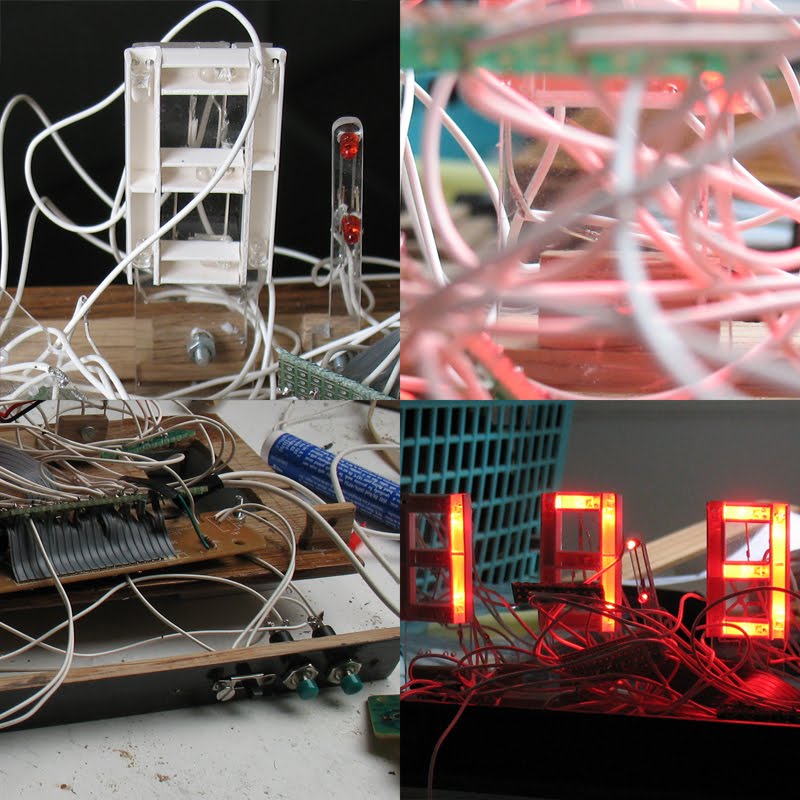
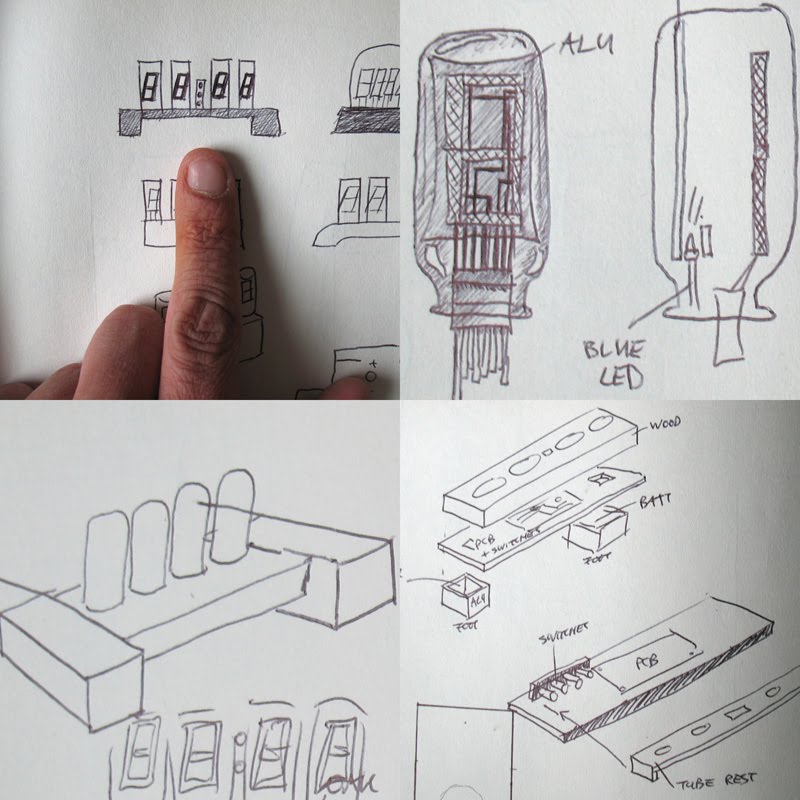
I realize it's not going to be easy making the display work, 4 numbers separated by jars, each needing wires to the main PCB. It's gonna be messy.
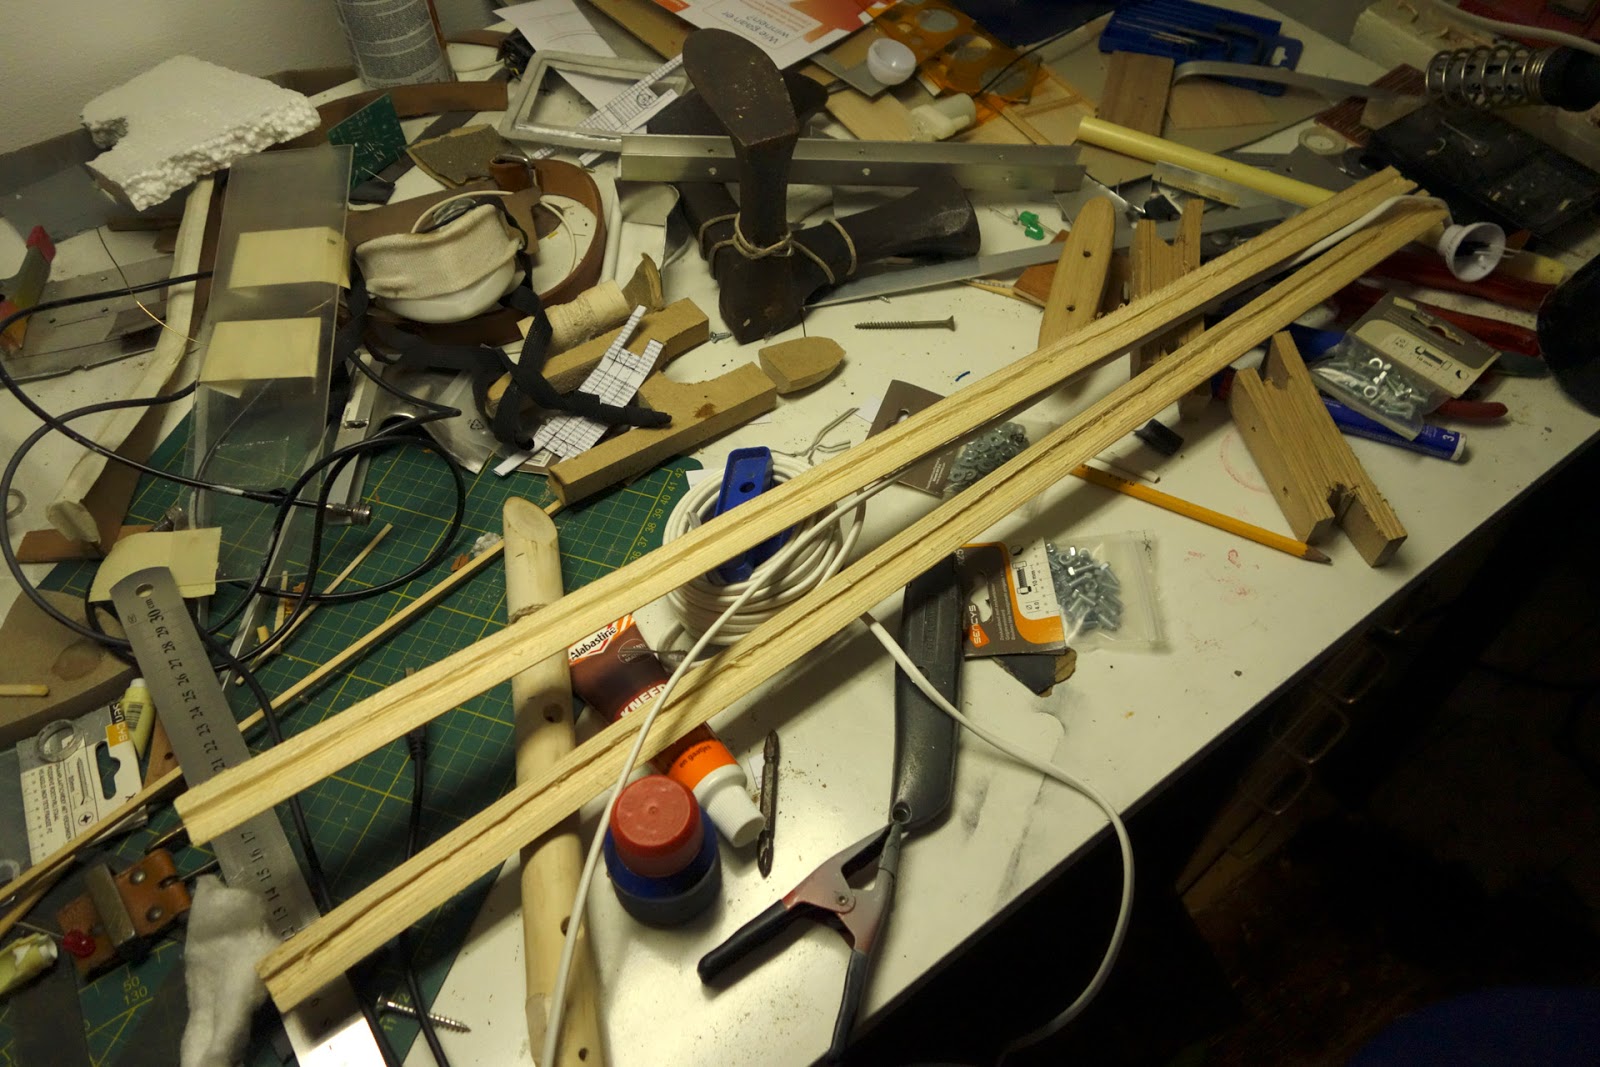
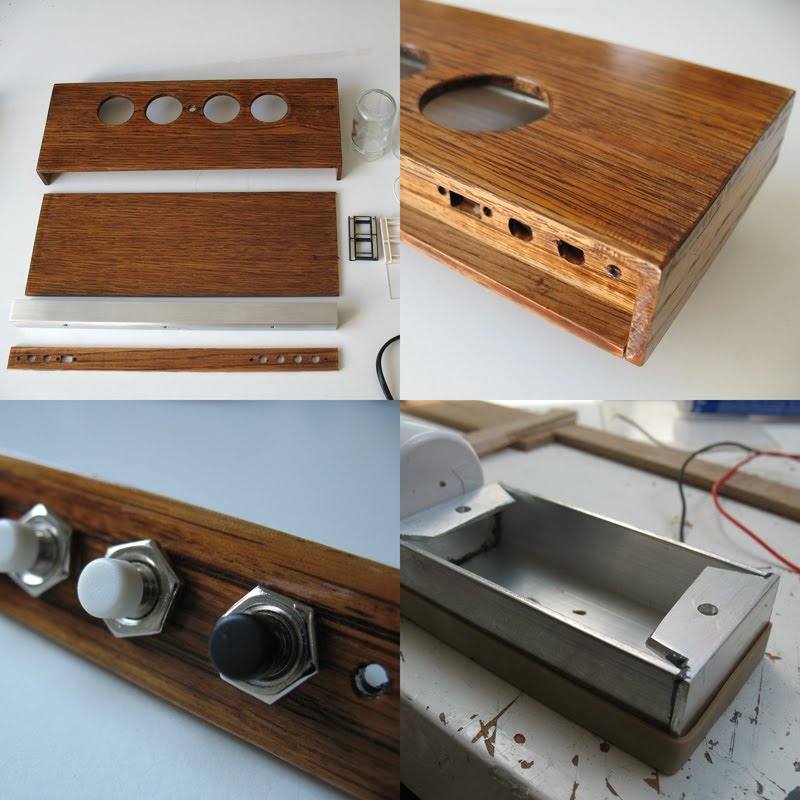
For the housing I found oak strips of wood, 4 x 35 mm and decided the width of the housing should be 3 strips wide, 105 mm.
In the supermarket I selected jars that hold a spicy sauce called "sambal", which I happen to like, so no wasting here. Put the contents in a bigger jar, washed the 4 jars and they're ready to go.
While I start on the housing I'm going to have to figure out which wire out of the PCB connects to which LED eventually in the display. I took a photo of the original display and will trace the lines to get a schematic view of the different power lines.
Next time hope to have some of the housing ready and a single number display test to find out if this could actually work, since I have no clue how much power the display is using now and if that's sufficient for the upscaling I'm planning using powerful 3 mm red LED's.
Thursday, May 27, 2010
Poor Man's Nixie Clock
Hi everyone, welcome to my blog. Ever seen a Nixie clock? They are the coolest of the coolest of clocks. I instantly wanted one. But they're expensive. How about building one myself? Well, you could, you can buy a kit for about 100 euro, but it's only a real tiny clock. And I'm worried about the high voltage that the tubes use, I'm kind of inexperienced with electronics and electricity, I might kill myself...
So, why not make a clock that looks as cool as a Nixie clock but is more manageble in terms of safe use of power? That's why I want to build the poor mans Nixie clock, not cause I'm poor but because I need to find an alternative way to get the same cool clock using simple parts and low current.
Let's get to it. I made a drawing and I'm gonna use oak wood for the housing, as well as aluminium and the tubes will have to be substituted by small jars :) In which I will put 7-segment displays which I will also make myself, don't know yet how.
Next time, handling wood and chosing a donor alarm clock.
See ya soon.
Subscribe to:
Comments (Atom)


